
When all the nadis that are now full of impurities become purified, then only can you successfully perform pranayama”.- Hatha Yoga Pradipika, 2.4
Table of contents
- Neti – cleansing your nasal passages with a saline solution.
- Kapalabhati: purifying your breath, mind and body
- Tratak: steady gazing / Tratak with a candle flame
- Tratak Variations
- Oil-pulling: kaval dharnam
- Dhauti – cleansing the upper digestive tract
- Shankh-prakshalana
- Eye Exercises
- Learn more about purification methods and ayurveda in one of our seminars
Neti – cleansing your nasal passages with a saline solution
Many people develop the habit of breathing through their mouths, simply because their noses are blocked. Your nose is designed for breathing; your mouth is not. So, before you attempt to do breathing exercises, it is best to start with some nasal cleansing.
Neti is an excellent means to cleanse your nasal passages and sinus cavities of pollution, dust, pollen and excess mucus. It is useful to everyone who lives in a modern city and works in an office, or takes public transport – or goes into shops, i.e. almost everyone. It is especially beneficial for people with asthma, allergies and other respiratory problems. You can do this simple, hygienic practice daily – preferably each morning just after you have brushed your teeth. At first you may want to practice neti in front of a mirror so that you can see the openings of your nostrils.
- You will need a small “neti pot”with a spout. These are available from most health food shops and online – also they are sold by many pharmacies and chemists. Fill the neti pot with the lukewarm water. Add approximately ½ teaspoon of fine sea salt and stir until the salt is absorbed.
- Leaning over a sink, inhale breath and hold your breath. Tighten the back of your throat as though you were about to gargle. Tilt your head to the left and pour the salt-water into your right nostril. Allow gravity to drain the water out through your left nostril. Do not inhale the water
Blow your nose and repeat the procedure by tilting your head to the right and pouring the water through your left nostril. After performing neti on both sides, be sure to blow out all excess water.
Kapalabhati: purifying your breath, mind and body

The Sanskrit word “kapala” means skull; “bhati” denotes shining. In this exercise, you use your breath to cleanse your respiratory and circulatory systems. With regular practice, kapalabhati purifies your entire system so thoroughly that your face shines with good health and inner radiance.
The best time to do kapalabhati is right after practicing neti (see above), at the beginning of your pranayama session or before your meditation.
Kapalabhati cleanses your nasal passage, lungs and entire respiratory system while strengthening and increasing your lung capacity. It helps to drain your sinuses and eliminate accumulated mucus. It also eliminates carbon dioxide and other impurities from your blood stream, permitting the red-blood cells to suck in more oxygen. The additional oxygen enriches your blood and aids in the renewal of body tissues.
The movement of your diaphragm and abdominal contractions massage your stomach, liver, spleen, heart and pancreas. Your abdominal muscles are strengthened; digestion tends to improve.
Kapalabhati refreshes and invigorates your mind. You will probably experience an increased alertness as a result of the additional intake of fresh oxygen. Expect a feeling of exhilaration and an increase of mental clarity.
How to do kapalabhati:
Sit with your back straight and your head erect, preferably in a cross-legged position. If you are unable to sit cross-legged, sit on a straight-backed chair with your feet flat on the ground. Take 2-3 exaggerated deep breaths, then inhale and begin the rhythmic abdominal pumping as follows:
- Contract your abdominal muscles quickly. This causes your diaphragm to move up into your thoracic cavity, emptying the air from your lungs and pushing it out through your nostrils.
- Relax your abdominal muscles; passive inhalation takes place. Your lungs automatically inflate with air. Do not forcefully inhale.
Repeat this rapid pumping. End on an exhalation and then take 2-3 deep breaths to bring your breathing back to normal. This is one round of kapalabhati.
Start with three rounds of 20-25 pumpings each. Gradually increase this to a daily practice of 3-5 rounds of 30-50 pumpings each.
CAUTION: Kapalabhati should not be practiced during pregnancy or menstrual period. It is counter-indicated if you have a hernia, abdominal pain or cramping, high blood pressure or are experiencing an asthmatic attack.
The mechanics of kapalabhati can be a bit difficult to grasp; it is suggested that you learn to do it from a qualified yoga teacher.
Tratak: steady gazing / Tratak with a candle flame
“Gaze with motionless eyes at a minute object with your mind concentrated until tears come. This is called trataka by the gurus. By trataka, sloth and all diseases of the eyes are removed. So it should be carefully preserved, as you would a golden box”. -Hatha Yoga Pradipika
Tratak: steady gazing
Tratak purifies your physical eyes, tear ducts and sinuses; it helps to strengthen your eyesight and brings a fresh supply of blood to the forehead region. It also cleanses your brow (ajna) chakra, decreases lethargy and increases your powers of discernment. If you are attempting to establish a meditation practice, tratak can be a great aid to intense concentration. Tratak stimulates the pineal gland. This smallest member of the endocrine system is located at the centre of your brain, between the two hemispheres. It produces melatonin, the serotonin derived hormone that regulates sleep patterns, your internal body clock and seasonal cycles. Regular practise of tratak can be especially effective in the winter months, when reduced levels of sunlight may cause you to suffer from Seasonal Affective Disorder (SAD). The exercise may also prove to be a great aid if you suffer from insomnia and other sleep-related disorders.
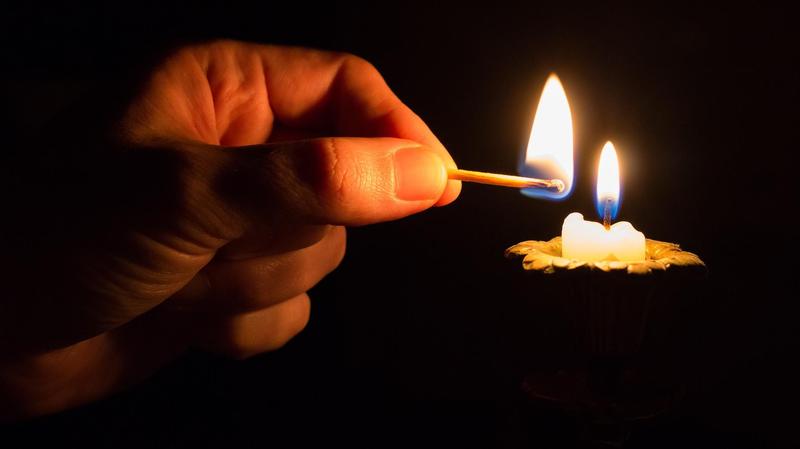
Tratak with a candle flame
- The most common form of tratak uses a candle’s flame as its focal point. This works best when practised in a darkened room. If you wear glasses or contact lenses, it is suggested that you remove them.
- Place a lit candle an arm’s distance in front of you. Ensure that your eyes and the candle flame are on the (approximately) same horizontal plane, with the candle just slightly lower than your eyes. Make sure there is no draft so that the flame remains steady and non-flickering.
- Sit in a comfortable meditation position with your spine straight and head erect. Allow your hands to rest comfortably in your lap or on your thighs.
- Open your eyes wide and look deeply into the flame, trying to not blink. There should be no tension in your face or eye muscles as you do this. Hold the gaze for approximately one minute. Do not allow your eyes to cross. You will know that your eyes are loosing their focus if multiple images start to appear.
- Optimally, there should not be no movement of the eyeballs. Do not strain or tense your eye muscles, as this might cause a headache. Just look at the flame in a relaxed yet unflinching manner. Notice that the flame has several rings of differing colours. If your eyes start to tear, this provides an excellent cleanse to your eyes and tear ducts.
- After one minute, close your eyes to permit the eye muscles to relax.
- You may repeat this process of gazing at the candle and relaxing the eyes several times.
- When you are ready, gradually increase the time of gazing to three, five or even ten minutes.
- When you close your eyes, visualise the exact flame that you were just looking at. Hold the image firmly at the point between your eyebrows.
- You are not concentrating on the physical stimulation of the optic nerve that occurs anytime that you look at a bright light. Instead, in tratak, you are using your mind’s eye to draw a mental picture of the flame, including all its rings and various colours.
- When you are finished, splash some cold water on your eyes.
Traktak variations

Dhrishti: eye focus
Dhrishti, the practice of fixing your gaze, is a cleansing discipline in itself and can bolster the purifying effects of other practices. It helps you to stay present in the moment, relieves tension and improves blood circulation to the frontal region of your head and to your brain.
When using dhrishti, you stop your attention from wandering by directing it to specific points. This stimulates the healing flow of subtle energy within the meridians (referred to as ‘nadis’ by yoga practitioners) and removes blockages from these channels.
These gazes, best practiced under the guidance of an experienced teacher, cleanse, stimulate and equalize the energy of both major and minor chakras. They facilitate the holding of balancing poses and draw the body into correct alignment.
Variation 1: Nasagra drishti – nasal gaze
Begin with nasal gazing. Sit in a comfortable meditative position with your back straight and your head erect. Turn your gaze downward and focus both eyes on the tip of your nose with your eyelids half closed. Hold this for only 10 seconds; then close and relax your eyes. Gradually you may build up to one minute, as long as your eyes do not feel strained. Once you have perfected this technique, notice how its use strengthens your eyes and enhances such poses as ‘the yawning lion’ (see page 00)
When you have perfected the nasal gaze, and can do it without experiencing tension, try turning your eyes upward. The eyeballs themselves are turned up towards the frontal region of the brain and the vision is fixed on the point between your eyebrows.
Variation 2: Bhrūmadhya drishti – frontal gaze
Advance students start concentration by directing and turning the half-closed eyes toward the space between the eyebrows, which is also known as the Ajna Chakra, or Third Eye. By directing the gaze at this point the olfactory nerves and optic nerves are stimulated and, in turn, the automatic nervous system and central nervous system are awakened. Done slowly, this exercise has a soothing effect on the cranial nerves and helps the mind to become one-pointed. Advanced students will find this exercise very useful as a breathing exercise and to awaken the Kundalini Shakti. However, it is best to avoid too much strain on the eye muscles. Prolonged practice without the guidance of a teacher may affect the eye muscles as well as the nervous system.
Maintain this gaze for only 10 seconds. Then rest and relax your eyes. It may be used in asanas, such as the ‘fish pose’ (Matsyasana), but prolonged practice is not recommended.
For more information see:‘Complete Illustrated Book of Yoga’ by Swami Vishnu-devananda (pages 31-34)
or ‘The Cleansing Power of Yoga’ by Swami Saradananda (pages 46-47)
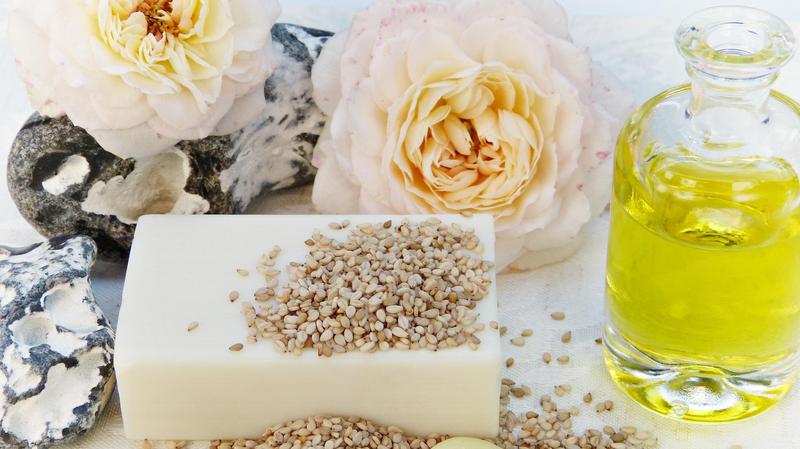
Oil-pulling: kaval dharnam

Oil pulling is a highly effective way to reduce tooth cavities and eradicate bad breath. It removes many harmful bacteria and other toxins that try to make your mouth their home, eliminating them before they have the opportunity to spread to the rest of your body. It strengthens your tongue and gums, helping to eliminate plaque – and plague-induced gingivitis. You will have no need for chemical teeth whitening strips. The oil possesses natural antibiotic and antiviral properties that brighten and clean your teeth, keeping them pearly white.
Prepare your oil beforehand. Organic, cold-pressed sesame oil (make sure it is untoasted) probably works the best, but coconut or virgin olive oils are also excellent. You may also want to add a drop of an anti-microbial essential oil, such as tea tree, oregano or lemon oil. The essential oil has the potential to amplify the cleansing benefits of the oil pulling process, but add no more than 1 drop of essential oil to 30 ml (1 fluid ounce) of carrier oil; too much could be irritating.
Practice oil-pulling first thing in the morning, on an empty stomach. Place a large spoonful of oil into your mouth and swish it around for up to 20 minutes. You may go about other tasks while you are doing this, such as making your bed or getting dressed.
After 20 minutes, or whenever your mouth get tired, spit the oil out into the waste bin. Do not spit it into the sink, as its stickiness can encourage the pipes to clog. Then brush your teeth with a natural fluoride-free toothpaste and rinse your mouth.
DO NOT use oil pulling in place of your brushing your teeth. Also, do not swallow the oil as you will ingest the toxins you are trying to wipe out.
When you start oil pulling, you might experience the positive effects immediately, or it may take a few weeks.
NOTE: If you don’t have time for oil pulling, chew 1-2 cardamom seeds. They are an excellent mouth freshener that promotes oral health.
Dhauti – cleansing the upper digestive tract
Modern hygiene focuses on external cleanliness, advocating regular bathing of the body and brushing your teeth, but it says little of internal purification. The human digestive system needs periodic internal cleansing to maintain good health.
Dhauti includes a series of practices that cleanse the upper digestive tract, i.e. the throat, oesophagus and stomach, so that you can pursue your goals in life without the least possible discomfort, fatigue or interruption. Although the following techniques may seem a bit exotic at first, they lay the foundation and assist you in obtaining optimal benefit from the better-known yoga techniques of postural and breathing exercises.
NOTE: no form of dhauti should be attempted during pregnancy – or by any one who has, or has had, an eating disorder.
“Contracting the anus, draw the apana up to the throat and vomit the contents of the stomach. This act that generally brings the nadi chakras under control is called gaja-karani.”- Hatha Yoga Pradipika, 2.38
Vamana dhauti: stomach purification using water
Also known as kunjal kriya or gaja-karani, this practice uses water to cleanse the stomach and oesophagus. It must be done first thing in the morning before eating or drinking anything else.
Prepare for the exercise by mixing 3-5 tsp salt into 2-3 litres of lukewarm water (36-37 degree). If you prefer, you may leave out the salt.
Drink the salt water and then gently massage the stomach (on the left side, just under the ribs) for 1-2 minutes.
Using the index and middle fingers of one hand, tickle the root of the tongue at the back of the throat until the water is vomited up.
You may practice this exercise once per week. It is advisable to practice with guidance in the beginning.
Shankh-prakshalana

Shankh-prakshalana is a natural means of cleansing your entire digestive system. It is best practiced twice a year at the changing of the seasons. The process itself takes about 1-2 hours; you will need to rest and take light food for the rest of the day.
The idea is to drink salt water while performing simple yoga exercises. These movements stimulate the water to cleanse your digestive tract, eliminating one of the major causes of physical stress and the promoting good health of your entire system.
Choose a day when you are free of work and other responsibilities. Prepare yourself by eating lightly for three days beforehand, completely avoiding meat, fish, eggs, alcohol and dairy products. The night before, eat a small meal, preferably just some fruit. Practice first thing in the morning on an empty stomach.
Mix 60-75 grams of sea salt into 4-5 litres of warm water (36-37° C). The water needs to be salty otherwise it’s not going to reach your colon. Instead, your body will evacuate it as urine.
- Drink 1-2 glasses of the prepared salt water; perform a round of the exercises given below.
- Keep drinking and doing the exercises until you have done this six time. You may find the salt water difficult to swallow after the fourth glass, but continue.
- Visit the toilet as often as necessary. If you cannot get a desirable result, massage your abdomen by moving your hands clockwise.
- Continue this procedure of drinking salt water, practicing the asanas and visits to the toilet until you see clear water coming out of your colon.
- Wait at least 30 minutes after finishing Shankh-prakshalana before eating. Don't drink before you eat, even if you feel thirsty. If you drink, you will go to the toilet again.
- Rest for the remainder of the day; eat only kitchari, i.e. rice and lentils cooked together until they are slightly soft. Add ghee or sesame oil, but no spices. Drink only herbal tea or mineral water for the rest of the day.
- For the next few days, avoid meat, fish and eggs, dairy products; raw fruits and vegetables; sour, fried and spicy foods, coffee, black tea, alcohol, and any foods that are rich or heavy.
Movements:
- Tadasana: stand with your feet approximately 30 cm apart. Lift your arms over your head with the elbows straight. Interlock your fingers and turn palms upwards and give your body an exaggerated stretch, making yourself as tall as possible for 3-5 long breaths
- Crescent moon: without twisting, bend towards the left as far as you can, keeping your weight evenly distributed between both feet – then to the right. Repeat these movements 3-4 times to each side.
- Standing twist: drop your arms and remain in your standing position. Gently swing your arms as you rapidly twist from side to side; do this 3-5 times to each side.
- Cobra pose: Lie on your abdomen with your feet approximately 30 cm apart; tuck your toes under and bring your hands flat on the floor under your shoulders. Straighten your elbows so that your body lifts slightly and only your palms and toes are touching the ground.
- Turn your head to look over one shoulder as you twist your trunk, trying to see the opposite heel. Repeat this movement on each side 3-5 times.
- Spinal twist: sit on the floor with your legs straight out in front of you. Bend your right knee and place your right foot flat on the floor just outside of your left thigh. Place your left hand on your right knee and twist around to the right as far as possible, looking over your right shoulder. Hold this for 3-5 breaths and then repeat on the other side.
CAUTION: people with serious stomach or other digestive disorders should not practice shankh-prakshalana. Also, do not attempt it during pregnancy or menstruation – or if you currently have or have ever suffered from an eating disorder.
Eye Exercises
Eye exercises improve physical vision and protect your visual abilities from the negative effects of artificial light and stress; they also help you to be more focused and to gain spiritual insight. They are especially beneficial if you spend long periods of time reading or working at a computer.
Eye exercises can be practised while sitting on a chair (preferable a straight backed one), in a kneeling position or seated cross legged. Be sure to keep your back and head straight. The movements work best when practised in a slow, gentle manner.
Be sure to move only your eyes, not your head. At first, you may want to have a friend watch to check that you are not moving your head. If your eyes start to tear or water, count it as an especially successful cleanse. It is best to remove glasses or contact lenses when practising eye exercises.
Up and down
Open your eyes wide; imagine that you are popping them out of your head. Keeping the head and neck still, look up as high as you can, then down. Do this10-15 times. Then close your eyes and relax them for a moment.
Right and Left
Raise your left arm with the thumb pointing upward and the elbow straight. Open your eyes wide and focus them on your thumb nail. As you slowly move your hand to the left, follow the nail with your eyes. The slower you move, the more your eyes have to work and the more benefit you receive.
Move the hand out as far as you can see, without moving your head. Then, just as slowly, return your hand and eyes to centre. Change arms and repeat to the right. Do this 2-3 times on each side. Close and relax your eyes.
Diagonal and circles
Open your eyes as wide as possible. Without moving your head, look up at your right thumb, down at your left and up to the right again. Repeat these movements 8-10 times. Then change arms and repeat. Rest your eyes for a few moments.
If you like, you can also rotate your eyes slowly in clockwise direction; making sure that you reach the whole circumference of the widest circle possible.
After 3-5 rotations, change to an anti-clockwise direction.
Nose and third-eye
Open your eyes wide. Raise one hand in front of your nose with arm fully extended and the thumb pointing upward. Keeping your focus on the thumbnail, slowly bend your elbow and move the thumb towards the tip of your nose. Come as close as you can focus, then reverse, moving the thumb outward. Do this 5-10 times.
In the second part of this exercise, lift your extended arm 6-8 cm. Slowly bring your thumb in towards the point between your eyebrows. Keeping your focus on the thumbnail, move the arm in and out 5-10 times.
Relaxing the eyes
Close your eyes and rub your hands together vigorously, until they feel slightly warm. Cup the palms over your eyes, so that they cover your eyes. Make sure your neck is long and not contracted at the back. When your eyes feel relaxed, drop your hands and blink a few times.
Conditions of participation
Yoga Vidya is a non-profit association and Europe's leading provider of education and training in yoga, meditation, Ayurveda, massage, holistic health and spirituality.