If a friend tells you, “I’m going to a yoga class” you would probably understand her to mean that she is going to do some physical exercise. Asanas are the most popular and most widely known practice of yoga in the West.
However, asanas are quite different from most other forms of physical fitness, in many ways. They do not attempt to develop your muscles through mechanical movements; instead they demand your full attention. Therefore they make your mind steady, concentrated and ready for meditation.
Table of contents
- Yoga exercises: Asanas
- Some general guidelines for asana practice.
- Warming up: Neck stretches
- Tadasana: standing steady as the mountain
- The Sun Salutation
- Inverted poses: have a new vision of life
- Halasana: The Plough
- The Bridge
- The Fish
- Paschimottanasana:the seated forward bend – or “western” stretch
- The Cobra
- The Half-Locust
- The Full-Locust
- The Bow
- Half-spinal twist
- Some simple variations of the spinal twist
- Standing forward bend
- The Triangle
- The Tree
- The Peacock
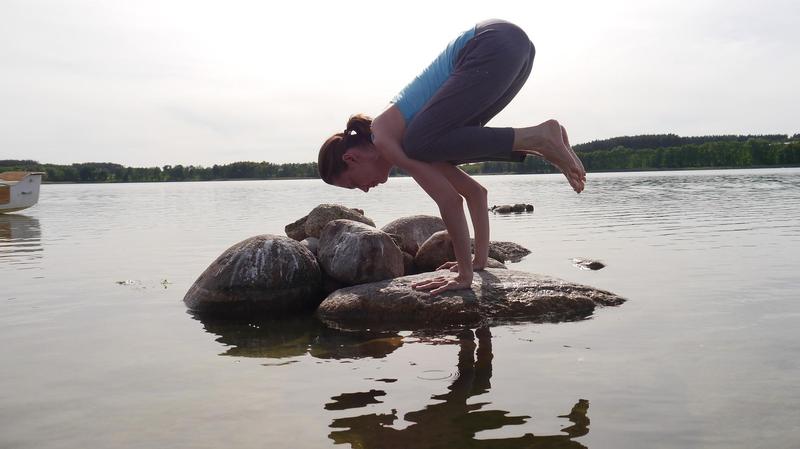
- The Crow
Yoga exercises: Asanas
A better translation for the word “asanas” would be pose, position or seat. The term implies much more than physical exercise. Asanas work on every aspect of your physical being, not just your muscles and joints. They massage your internal organs, stimulate circulation and enhance respiration. Its roots are connected to the idea of being fully present in the moment and being firmly grounded in your body.
Yoga sees your body as a vehicle for your soul in its journey towards perfection. When practiced regularly, they develop your mental capacities, broaden your consciousness and ignite your spiritual yearnings. Good health and physical fitness are a much-welcomed by-product, but not the final objective of the practice of asanas. The real goal of asanas, as of all yoga practices, is inner peace.
Asanas emphasise slow, gentle, non-violent movements. One of the basis tenets of yoga is, attempting to do no harm to any living being, including yourself, in thought, word or deed. Non-violence involves being non-competitive with others and not being too harsh or judgement with yourself. It if best if you never force your body into any position.
To master the asanas, work steadily but slowly. Fast movements often result in a build up of lactic acid in your muscles, leaving you feeling tired and stiff. Increasing the amount of oxygen you bring into your cells can neutralise the lactic acid. This is one of the reasons that asanas are usually accompanied by an emphasis on deep breathing. Each asana is a position that puts pressure on a certain point(s), much as acupuncture or shiatsu does. As you hold the pose, you breathe deeply. Rather than thinking about something else, you actually focus on the tension and consciously “breathe” it out of your body. You begin to develop your abilities to control your own body by using your mind.
Rather than burning up energy, as do most forms of physical exercise, asanas tend to leave you feeling invigorated and more energetic. This is because they enable you to let go of tension that you have been holding in your muscles. With practice, asanas assist you to releasing energetic blockages. The energy that was stagnating becomes usable; it begins to circulate throughout your body and you feel invigorated!
Some general guidelines for asana practice
Warming up: Neck stretches
If you are stiff, especially if you are practicing in the early morning, you may want to start by giving your body a good shake. Let your fingers and hands go limp; shake them from the wrists. Then shake your arms, shoulders, feet and legs.
Sit or stand to do your neck stretches – these are especially helpful in this day of increased neck problems as a result of using ipad and other tablets.
Forward and back: drop your head down towards your chest, so that your chin touches (or almost touches) your breastbone; hold this for 2-3 seconds to allow your neck muscles to relax and stretch out. Then lift your chin up towards the ceiling as you bring your head back as far as you can. Visualise the back of your head touching your spine, hold for 2-3 seconds.
Repeat these movements 3-4 times in each direction. Return your head to its upright neutral position.
Stretch side to side: bring your head down to the left side so that your left ear comes as close to your left shoulder as possible. Do not allow your neck to twist or your shoulders to lift. Bring your head back to centre and then stretch to your right.
Repeat these movements 3-4 times in each direction. Return your head to its central upright position.
Turn your head from shoulder to shoulder: without moving your shoulders, turn your head to look over your right shoulder, as though you are trying to see behind your back. Then turn to the left.
Repeat these movements 3-4 times in each direction. Return your head to its central position.
Tadasana: standing steady as the mountain
Standing up straight is a simple, yet profound, action. It enables you to connect with and draw up energy from the earth. You ground yourself and feel that you are fully present within your own body.
- Stand firmly with your feet directly beneath your hips and your knees straight. Feel your body weight spread evenly between your feet.
- Without lifting your foot itself, raise your toes and spread them wide apart. Replace your toes on the ground.
- Close your eyes and become aware of the exchange of energy between your feet and the earth. You may find it helpful to visualise yourself sending roots down into the earth to draw its energy up into your body.
- Feel the energy spreading upward into your legs. Experience your shins over your heels. Make sure that your knees are straight, but not locked.
- As the energy comes into your trunk, ensure that your hips are straight. Imagine that you are bringing your tailbone forward to meet your pelvic bone.
- Allow your arms to relax alongside your body, with your elbows straight but soft. Be sure that your chest is lifted, your spine erect, your shoulders relaxed. Feel as though your collarbones are broadening
- Have your head upright with your chin parallel to the ground. Gaze straight ahead.
- Breathe deeply and hold tadasana, constantly re-checking your body to make sure that it remains straight.
Practice tadasana for as long as you like. It is an asana in itself and also the starting point for many of the other poses.
Benefits of the mountain pose
- Physical balance and mental poise are enhanced.
- You become aware of your posture and the alignment of your spine.
- You fully experience your connection with the earth and its energies.
The Sun Salutation
The traditional wisdom that “you are as young as your spine” defines the primary benefit of this excellent 12-part warm-up exercise. The sun salutation stretches your spine forward and back, while promoting flexibility in other limbs as well. Each position is connected with your breathing.Begin by standing erect in tadasana. Have your feet together and your arms relaxed along side your body. Inhale deeply and prepare yourself mentally to begin.
- Breathe out as you bring your palms together directly in front of your breastbone in the classical “namaskar”, or prayer position. This movement helps to you to centre your body and mind.
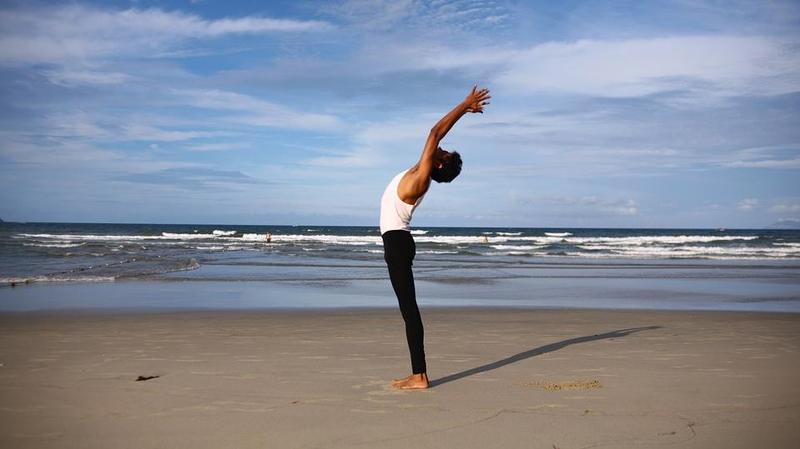
- Breathe in as you straighten your elbows and stretch your arms straight up alongside your ears. Your hands are high up over your head with your palms facing each other. Simultaneously, arch your entire body backwards, keeping your knees and elbows straight. This is a complete stretch for your body – from fingers to heels.
- Exhale and bend forward. Place your hands on the ground on either side of your feet. Bring your head in towards your knees. If you are unable to reach the ground with your knees straight, allow your knees to bend, but only as much as is necessary.
- Inhale as you step your right leg back as far as possible. Bend both knees and place the back knee on the ground. Look up, keeping your hands on the ground.
- Hold your breath as you bring your left foot back in line with your right; straighten both knees. Your body is now in a “push up” position, with your back and legs forming a straight line from the head to the heels.
- Exhale as you bend your knees and bring them down to the ground. Keep your hips up and drop your chest to the ground between your hands. Place your chin on the ground.
- Without moving your hands or feet, inhale as you slide your body forward and arch up with your head and chest into “cobra” pose.
- Tuck your toes under and breathe out as you lift your hips high. Do not move your hands or feet; straighten your elbows and allow your head to hang down between your arms.
- Inhale and bend your left knee down to the ground. Step forward with your right foot. The toes of your right foot should now be in line with the tips of your fingers. Look up without lifting your hands off the ground.
- Bring your left foot forward, next to your right; exhale. Life your hips up and drop your head down towards your knees. Straighten your knees as much as possible, without lifting your hands off the ground.
- Inhale as you slowly straighten your body; stretch your arms forward and then up over your head. Arch back into the same position as you were in step 2.
- Exhale as you lower your arms by your sides and return to tadasana.
Begin with 6 sun salutations daily. Try to gradually increase it to 12 rounds.
CAUTION: if you are pregnant, do a modified sun salutation. This is best learned from a teacher who specialises in pregnancy yoga.
Inverted poses: have a new vision of life
Being upside down can offer interesting opportunities to enhance your views of life. To maintain an inverted position, you must be fully present in the here and now. These poses encourage lightness of thought as well as enhancing the grace of your physical body.
Preparing for the headstandwith the dolphin
The dolphin strengthens your arms and shoulders. It is a preparatory exercise that gets you ready physically and mentally for the practice of standing on your head.
- Sit on your heels with your knees and feet together.
- Hold each of your elbows with the opposite hand. Place your elbows on the ground so that they are directly under your shoulders.
- Without moving your elbows, release your hands. Clasp your hands together by gently interlocking the fingers. Your elbows and forearms now form a tripod on the ground.
- Keep your head up, tuck your toes under and straighten your knees.
- Without moving your arms or feet, rock your body forward so that your chin is in front of your hands. Then push your body up and back as far as possible. Rock forward and back 8-10 times.
- Relax in the child’s pose for a few moments – and then try the dolphin again. Remember to keep your weight on your elbows.
If your arms are weak and you find it difficult to move forward and back, practice only steps 1-4. Practice the dolphin for several weeks before attempting the headstand.
The Headstand
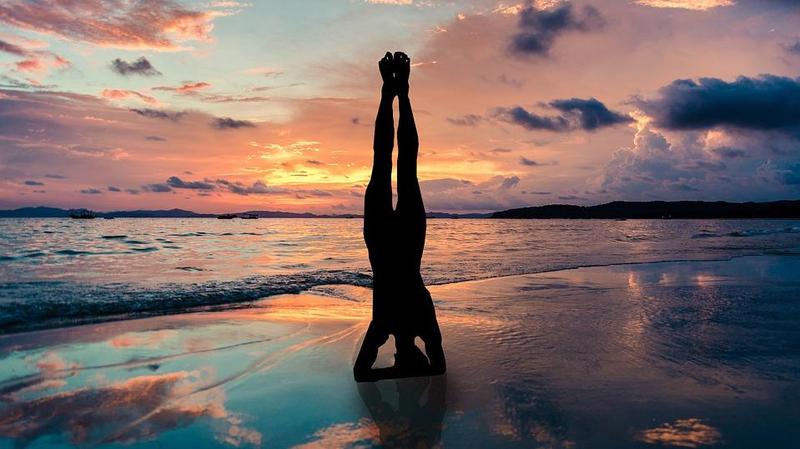
Practicing the headstand is not as difficult as you might imagine; if you have practiced the dolphin before attempting it. Many yoga teachers refer to it as the “king of the asanas”.
The headstand involves facing and overcoming fears and self-imposed limitations. It rests your heart by inverting your body and allowing gravity to assist in the venous return of the blood to your heart. The headstand strengthens your respiratory and circulatory systems. It also:
- brings lightness to your step and posture
- helps to drain stagnant blood from your lower extremities
- counteracts the pull of gravity on your abdominal and facial muscles
- Increases the supply of blood to your head, face and neck.
- may assist you in calming your mind and improving your memory
- enhances your view of the world
To do the headstand:
- Sit on your heels with your knees and feet together.
- Hold each of your elbows with the opposite hand. Place your elbow on the ground beneath your shoulders.
- Without moving your elbows, release your hands. Clasp your hands together; gently interlock your fingers. Your forearms now form a tripod on the ground. When you perform the headstand with your arms in this tripod position, the weight of your body is on your elbows rather than on your head or neck.
- Place the frontal portion of your head on the ground. Have the back of your head resting gently against your clasped hands.
- Straighten your knees without moving your head or elbows.
- Slowly walk your feet forward until your hips are directly over your head. Don’t allow your arms or head to move as you do this. Make sure that your weight remains on your elbows – don’t allow it to come onto your head.
- Bend your knees without letting your hips drop. Bring your heels up to your buttocks. Breath deeply and hold this position.
- This is known as the half-headstand. Make sure that you can comfortably hold it for at least 10 seconds before going any further in attempting the full headstand.
- Keep your knees bent and together as you slowly bring them up towards the ceiling.
- Straighten your knees and lift your feet until your body is in a straight line. Have your weight evenly balanced on your elbows.
- Breathe deeply through your nose; try to hold the headstand for 30 seconds, gradually building up to 3 minutes. Hold it only for as long as you feel comfortable.
- Very little weight should be on your head and/or neck.
- Be particularly aware of your relationship to/with gravity.
- When you are ready, come down slowly by bending your knees then your hips and placing your feet on the ground.
- Keep your head down and sit back on your heels in the child’s pose for at least two to three minutes.
AVOID the headstand if you have high blood pressure, glaucoma, detached-retina, a cold or blocked nose, or if you suffer from whiplash or other neck injuries. Do not practice the headstand, or any other inverted poses, if you are menstruating. An adapted headstand may be done up until your fourth month of pregnancy, but this is best learned from a teacher who specialises in pregnancy yoga.
DO NOT attempt the headstand in later stages of pregnancy
The Shoulderstand
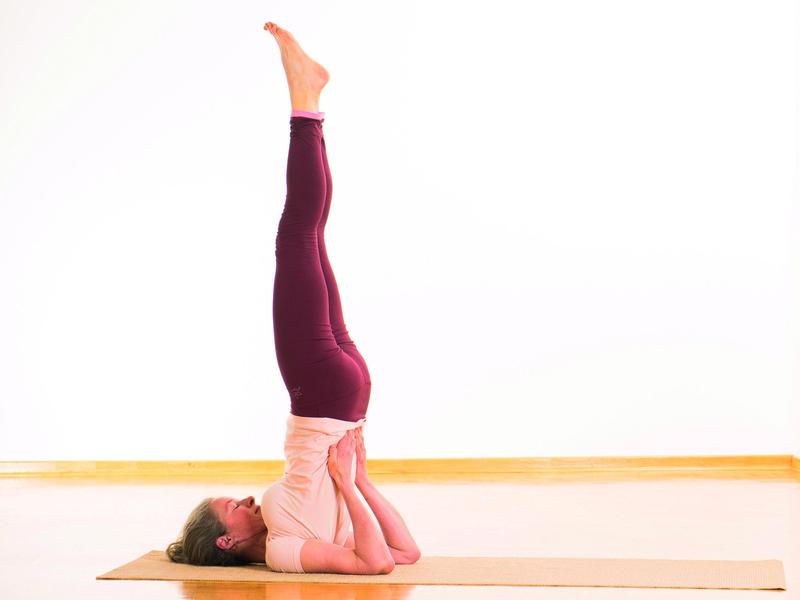
The Sanskrit name of the shoulderstand is “sarvangasana”, meaning “a pose that benefits all parts of your body”. The shoulderstand helps to relieve your mental lethargy. Practice it daily, if you work at a computer or stand on your feet a lot.
As you hold the pose, you will notice how your chin presses on your throat. The shoulderstand strengthens and balances your thyroid gland, which is located at your neck. Your thyroid controls metabolism and all of the other endocrine glands. Energy is focused on your throat chakra.
It helps to drain stagnant blood from your lower extremities. The cervical region of your spine is stretch, as well as your shoulder and upper back muscles. Many people find the shouldstand to be an excellent remedy for tight neck and stiff shoulders. New evidence seems to be arising that it can help even you to heal torn rotator cuff.
- Bring your hands onto your buttocks. Using your hands to support your back, lift your back until it is as straight as possible.
- Consciously relax your calves and your feet.
- If you are a beginner, hold the shoulderstand for no 10 seconds. As you start to feel comfortable in the pose, gradually increase the time to 3 minutes.
- To come down: drop your legs back, half way to the ground; bring your hands flat on the floor behind your back. Slowly unroll your body, bringing each vertebrae to the ground separately.
Avoid the shoulderstand if you suffer from neck injuries or are menstruating. If you are more than four months pregnant, you may be able to practice a half-shoulderstand variation, which is best learned from a teacher who specialises in pregnancy yoga.
Halasana: The Plough
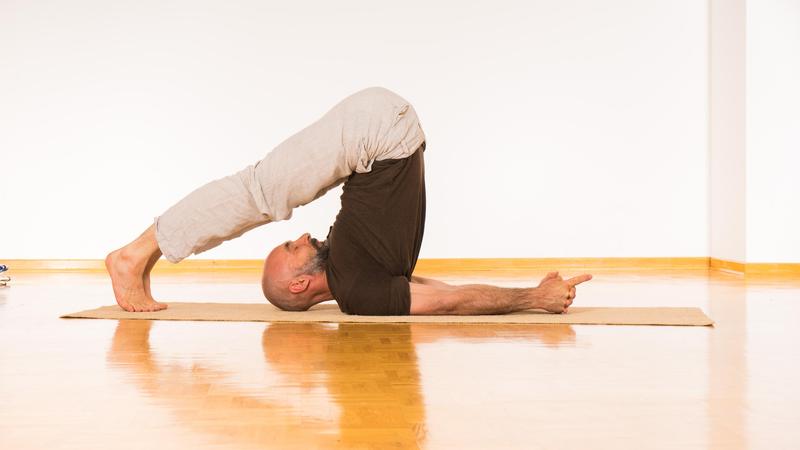
The plough is an excellent pose for stretching your entire spine; its particular focus is on your neck and shoulders.
- From the shoulderstand, exhale as you bring both feet to the ground behind your head.
- If your feet reach the ground, bring your hands onto the ground behind your back. If your feet can’t reach the floor, keep your hands on your back for support.
- Breathe as you hold the plough. Try to hold it for 10 seconds, gradually building up to one minute.
- When you are ready, slowly roll out of the pose, lowering each vertebrae separately while keeping your head on the ground. Always try to come out of the plough pose slowly, with full control.
Benefits of the plough pose
- The plough pose greatly enhances the flexibility of your cervical region, i.e. your neck and upper back, as well as your shoulders. It give a gentle stretch to your full spine.
- Yogis say that you are as old as your spine is flexible. Regular practice of the plough greatly slows the aging process.
- If you suffer from insomnia, regular practice of the plough pose will help to alleviate your sleepless condition.
- You will probably notice that your mind is becoming calmer and much clearer.
DO NOT attempt the plough if you are pregnant or menstruating. If you suffer from kyphosis of the spine, do not try to force yourself into this pose; just do as much as you comfortably can.
The Bridge
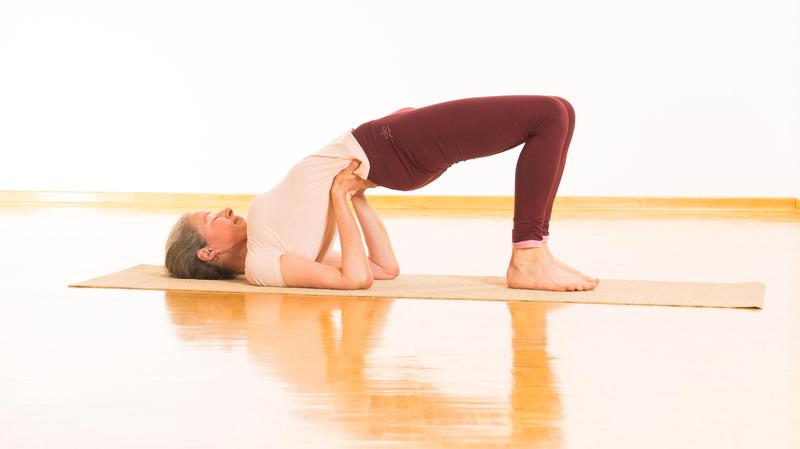
The bridge is a relatively easy backward bending pose that helps you to create an experience of expansion, in contrast to the introversion of the shoulderstand. The bridge provides a counter-stretch to both the shoulderstand and the plough; it relieves pressure from your cervical region (neck and upper back).
The bridge pose strengthens your abdominal and lumbar (lower back) muscles. It also enhances the strength and flexibility of your hands, wrists and spine.
- Lie flat on your back.
- Bend your knees and bring your feet flat onto the floor. Have your feet parallel to each other and hip-width apart. Do not permit your feet to turn outward; keep your knees in line with your feet.
- Lift your hips as high as possible.
- Place your hands flat onto your back with your fingers pointing in towards your spine and your thumbs up towards ceiling.
- Hold the bridge for 1-3 minutes, breathing deeply. Then, come down and relax.
- As you become more adept in holding the bridge-pose, gradually bring your feet and knees together. Then walk your feet away from your torso, without dropping your hips.
The Fish
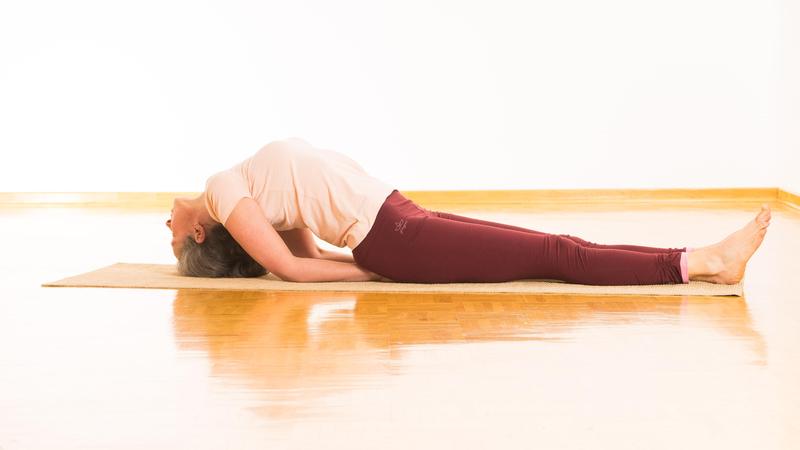
The Fish is a wonderful chest-opening pose that is usually done immediately after the Shoulderstand and Plough, as a counter-pose. As you stretch backward, you increase the flow of prana to your neck, upper back and shoulder areas. It also helps to enhance your breathing capacity. This means that you will probably find it really helpful if you hunch over a computer all day.
If you tend to breathe shallowly, have panic attacks and/or have asthma, you will probably find that regular practice of the Fish can help you to overcome your breathing problems.
To do the Fish pose:
- Lie flat on your back with your legs out straight. Bring your legs and feet together.
- Place your hands under your respective thighs or buttocks, with the palms facing downward and flat on the floor.
- Bend your elbows, pushing them into the ground. Gently, arch your chest upward and place the top of your head onto the floor.
- Hold the position for approximately 30 seconds and then come down to relax on the ground. Gradually build up to 2 minutes. Remember to keep your weight on your elbows. There should be little or no pressure on your head or neck.
- In the Fish, your chest is thrown wide open; take advantage of it by breathing as deeply as possible. Be sure to engage your rib cage in the breathing. Imagine that your ribs are like the gills of a fish, opening to pull oxygen and prana into your body.
- To come out of the position: lift your head slightly, slide your head back and lower your back to the ground. After the fish, remember to relax for a few moments in the corpse pose.
DON'T do the Fish if you have a whiplash or other recent neck injury, high blood pressure or suffer from migraine headaches. Also, never attempt it when you are having an asthmatic or panic attach – or any other breathing problems.
Paschimottanasana: the seated forward bend – or “western” stretch
Many yoga texts suggest that the best time to practice yoga is first thing in the morning, facing the rising sun. This means that your back is towards the west, hence the Sanskrit name of the seated forward bend “Paschimottanasana – the “western” stretch”.
- Paschimottanasana gives an intensive stretch to the entire back of your body – from your heels up to your scalp
- It provides a powerful massage to your internal organs.
- Regular practice will relieve compression of your spine. This is especially important if you stand or sit upright (perhaps at a computer) for a long period each day.
- It stretches your hamstrings, the usually tight muscles at the back of your calves.
- Holding this pose for an extended period calms your mind and helps you to become more introspective. If you would like to develop a meditation practice, be sure to do this pose daily!
To do:
- Sit up with your legs together and straight out in front of you. Beginners: if you find this uncomfortable, you may place a folded blanket under your buttocks.
- Inhale deeply as you stretch your arms straight up.
- Exhale as you stretch forward from your hips. Try to keep your back straight; do not let it arch. Feel as though you are stretching forward, not down.
- If possible, hold your feet or ankles. If you cannot reach them, you can use a strap – or hold onto your shins.
- Hold the position and breathe deeply. With each exhalation, feel as though some of the tension in your hips is being released. As the tension leaves, feel your body sinking forward a bit more.
Beginners may hold the position for 10 seconds before coming up and repeating the stretch again, 3-5 times. As you become more advanced, gradually increase the time you hold the pose up to 3 minutes.
If you are pregnant, try practicing this pose with your legs apart. But, remember that it is always best to learn from and practice with a teacher who specialises in pregnancy yoga.
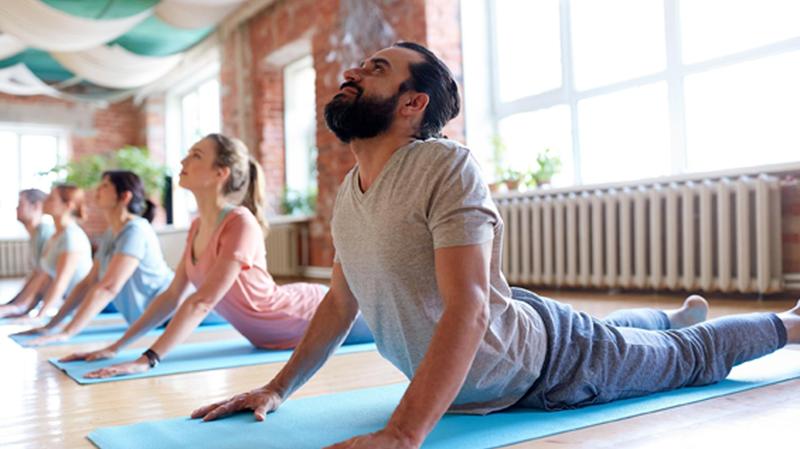
The Cobra
The Cobra is a wonderful pose that tunes your body and mind to the vibrant energy that is exhibited by the king of snakes. The pose enhances the general flexibility of your spine and back muscles, and it helps you to release the tension of hunched shoulders and a rounded back. It is an especially good asana to practice if you sit at a computer a lot. If you practice the Cobra regularly, the range of motion of your entire spine will increase. The pose massages, tones and strengthens your back muscles, particularly in the lumbar region. It also helps to strengthen the internal muscles of your abdominal and chest cavities.
How to do the cobra:
- Lie on your abdomen with your forehead on the ground.
- Place your hands flat on the floor, directly beneath your shoulders. Have your fingertips pointing forward. Your elbows should be bent, off the ground, in towards your sides and pointing backwards.
- Visualising the upward coiling movement of a cobra, begin to slowly roll up and back as much as possible, but keeping your abdomen on the ground. Allow your elbows to remain slightly bent and in towards your sides. Remember to keep your shoulders relaxed so that they are down and away from your ears.
- Beginners may hold this pose for 10 seconds, remembering to breathe deeply as you do so. As you advance, try to extend the amount of time until you are able to hold the Cobra for 30 seconds.
- When you feel ready, come down by slowly uncoiling your body. Repeat the Cobra 2-3 times
DO NOT practice the Cobra if you are pregnant – or any other asana where you are lying on your abdomen. There are many other excellent backward bending alternatives that you can do; these are best learned from a teacher who specialises in pregnancy yoga.
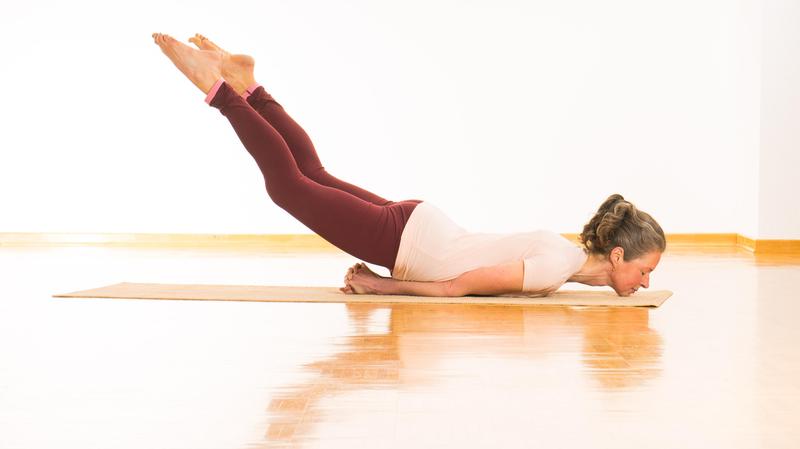
The Half-Locust
The Half-Locust, sometimes referred to as the grasshopper, strengthens your lower back and brings flexibility to your neck, shoulders and upper spine (cervical region).
To do the Half-Locust:
- Lie on your abdomen, face-downward, with your arms straight along side your body. Place your chin on the ground and slide it forward, making your neck as long as possible.
- Bring your arms beneath your body and clasp your hands together by interlocking your fingers. Keep your elbows straight.
- Inhale as you lift your right leg. Make sure that you don’t lift your chin or twist your hips as you lift your leg. Hold your leg up for approximately 10 seconds, gradually building up to 30 seconds.
- Replace your leg onto the ground and then lift your left leg. Repeat this process 2-3 times on each side.
DO NOT practise the half-locust if you are pregnant or have had a recent neck injury.
The Full-Locust
Immediately after doing the half-locust, practise the full-locust. This pose provides a comprehensive backward stretch to your neck and the cervical (upper back) region of your spine. It strengthens your lumbar (lower back) region and gives a powerful massage to your internal organs. The starting position for full-locust is the same pose as for the half-locust. Lie face downward on your abdomen; have the tops of your feet on the ground – do not tuck your toes under. Keeping your arms straight, bring them beneath your body and clasp your hands together. Try to have your inner elbows as close together as you can. Place your chin on the ground and slide it forward as much as possible. Take 2-3 deep breaths to prepare yourself physically and mentally for the full-locust.
On an inhalation, slowly lift both of your legs off the ground as high as you can. If you are a beginner, you may be able to lift them only a centimetre or two. However, with regular practice, you will probably find that your lifting power improves rapidly.
Try to hold the position for 3-5 seconds, making sure to breathe as you hold it. Also, make sure that your chin remains on the ground the entire time. Gradually build up to holding the full-locust for 30 seconds.
Slowly re-place both legs on the ground. Repeat the full-locust 2-3 times.
DO NOT practise the Locust if you are pregnant!
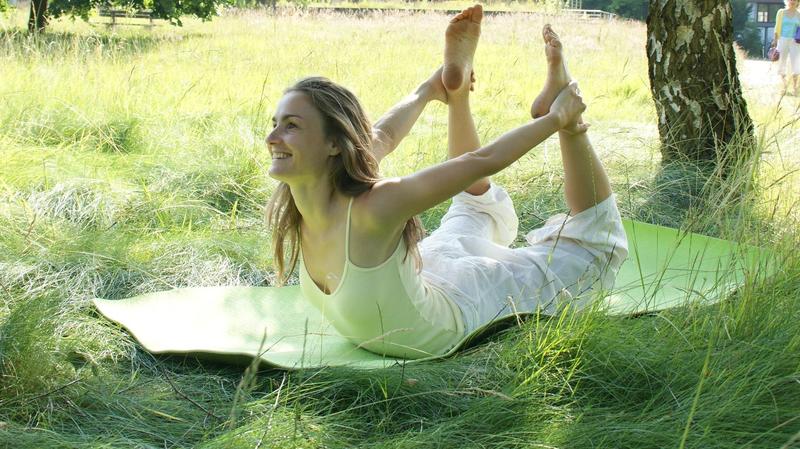
The Bow
The Bow is a wonderful backward bend that combines and enhances the benefits of the cobra, half-locust and full-locust poses. When you practice, you stretch your entire spine and the all of the muscles of the various parts of your back. At the same time, you also give a gentle massage to your internal organs.
If you sit at a computer all day, as most people do, you probably have the tendency to hunch your shoulders. The bow will help you to counteract the negative effects this has on your shoulders and back. With regular practice, the bow can help to prevent you from becoming round-shouldered.
When you practice the bow, you expand your chest an pull your shoulders back. This is of particular benefit if you suffer from asthma or other respiratory problems.
- Lie flat on your abdomen with your face on the ground.
- Separate your legs fairly wise, bend your knees and bring your feet up.
- Reach back and take hold of your ankles. If you are unable to reach the ankles, place a yoga strap around them and hold onto the strap.
- Keeping your elbows straight, inhale as you lift your head, chest and legs up off the ground. Lift your legs as high as you can and try to hold this position for at least 10 seconds. Don’t forget to breathe as deeply as possible as you hold the bow.
- Return your body to the ground. Rest for 2-3 seconds and then repeat the exercise. You can do this 2-3 times, building up to holding the bow for 30 seconds each time.
- If you like, you can also rock forward and back very gently to give your inner organs a bit more of a massage.
DO NOT attempt the Bow if you are pregnant or have had recent abdominal surgery.
Half-spinal twist
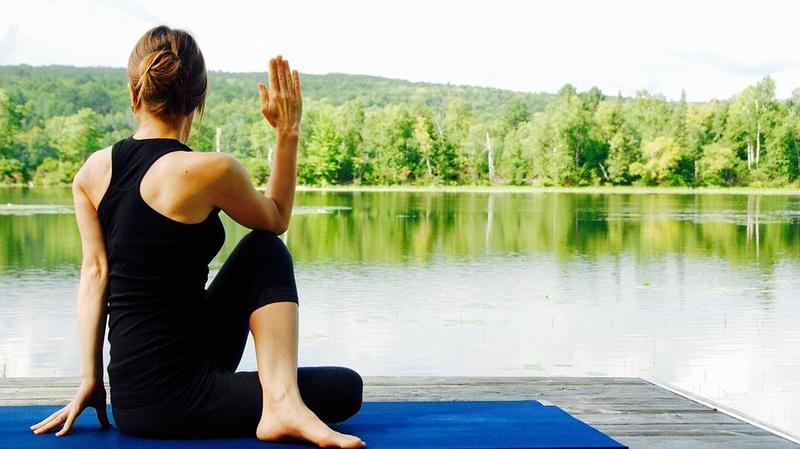
The Sanskrit name for this pose is “ardha-matsyendrasana”; it is named after Matsyendra-nath, one of the first teachers of hatha yoga. As one of the most powerful twisting poses, it rotates your body, squeezing out physical impurities and mental tension. The half-spinal twist also assists you in maintaining your spine’s elasticity and its side-to-side mobility; it gives a lateral stretch to your back muscles, massages your internal organs, and stimulates and purifies your solar plexus chakra.
- To practice the half-spinal twist, begin in a kneeling position, sitting on your heels.
- Drop your hips to the floor so that you are sitting to the left of your feet.
- Keep your right knee (the top one) bent and bring the right leg over the left. Place your right foot flat on the floor outside of your left knee.
- Bring your left arm over and around your right knee.
- Turn your head and look over your right shoulder.
- Breathe deeply as you hold the half-spinal twist for at least 10 seconds, gradually increasing your time to 1 minute. With each exhalation, feel that you are going more deeply into the pose and twisting a bit more. Remember to keep both of your buttocks down; your spine should remain perpendicular to the ground. Try to ensure that you are twisting your body and not leaning over.
- Release the position and repeat it on the other side.
DO NOT attempt the half-spinal twist when you are pregnant. There are a number of variations that do not put pressure on your abdomen; these are best learned from a teacher who specialises in pregnancy yoga.
Be careful of the half-spinal twist if you have had a hip replacement.
Some Simple Variations of the Spinal Twist Cross-legged spinal twist
If you’re a beginner or are pregnant, you can practice this variation of the Spinal Twist
Sit in a simple cross-legged position.Place your right hand on your left knee and your left hand behind your back – on the ground or on a blockTwist to the left as much as you can, keeping your spine perpendicular to the ground. Look over your left shoulderHold the pose for about 10 seconds, gradually increasing the time to 1 minute; make sure that you breathe through your nose. Return to centre and repeat this on the other side, with your left hand on your right knee.
Spinal twist with one leg straight
This is a fairly easy variation for beginners
Sit on the ground with your legs straight out in front of you. Bend your right knee and bring your right leg over your left leg. Place your right foot flat on the ground with your right knee up.Bend your left arm, twist to the right. Bring left arm to the outside of your right knee. With your forearm up, push against your right knee with your left elbow.Place your right hand on the floor behind your back; try to keep your spine upright. Don’t lean over. If you are unable to reach the floor, use a block.Hold the pose 10 seconds on each side, gradually increasing to 30 seconds.
DO NOT attempt this pose when you are pregnant.
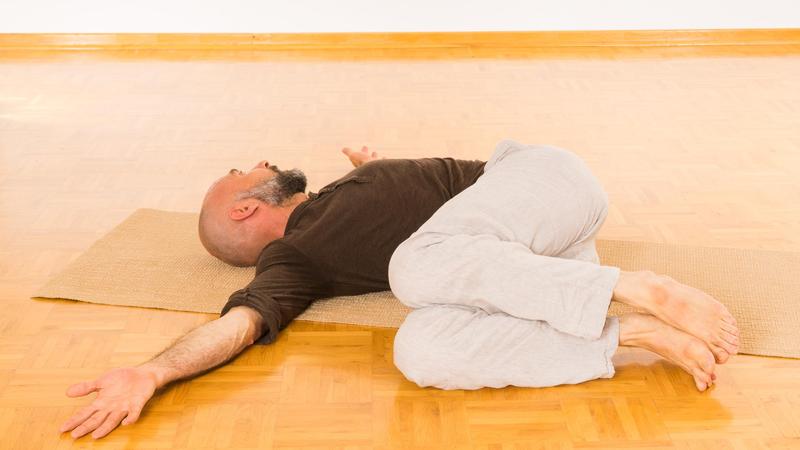
Reclining spinal twist
This simple variation releases tension in your lower back while gently stretching your shoulders and upper back.
Lie on your back. Stretch your arms out onto the floor at shoulder level.Bend your knees up towards your chest and bring them slightly to your right.Place your left hand on your right kneeKeeping both shoulders firmly on the ground, bring your knees to the floor to the right of your body.Turn your head and look at your left hand, which is still stretched out on the ground at shoulder level.Hold the pose for 10-30 seconds; return to centre and repeat steps 2-5 on the other side.
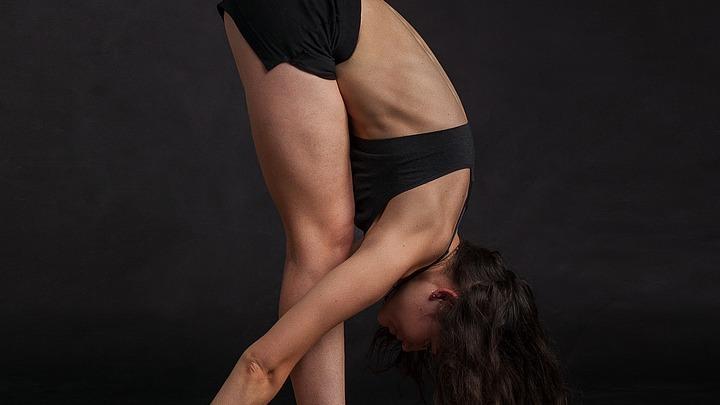
Standing forward bend
This is a simple, yet powerful position. It is a full forward bend, involving your entire body. Among the benefits you will derive from practicing it are:
Increased spinal flexibility
- Stretching of hamstrings and the other muscles in the backs of your legs
- Enhanced concentration from holding the pose
- It brings you humility and a more introverted attitude
- Begin by standing in tadasana with your feet directly beneath your hips; have your knees straight. Feel your body weight spread evenly between your feet.
- Inhale as you lift your arms up along side your ears. Have your elbows straight and close to your ears.
- Exhale as you bend forward and fold your body in half, bringing the top of your head towards the earth. Keepyour knees straight
- If possible, catch hold of your ankles. If you can’t reach your ankles, hold the backs of your shins or knees.
Breathe as you remain in this position, with your weight on the balls of your feet. Keep your hips up. Hold this position for 10 seconds, gradually increasing to 1 minute.When you are ready, inhale and stretch up again. Relax your arms and body for a few breaths and then repeat the ‘Standing forward bend’ 2-3 times.
NOTE: Do not attempt the standing forward bend if you have a cold or if your nose is blocked for any reason. If you are pregnant, practice this pose with your legs apart, preferably under the guidance of a yoga teacher who specialises in pregnancy yoga.
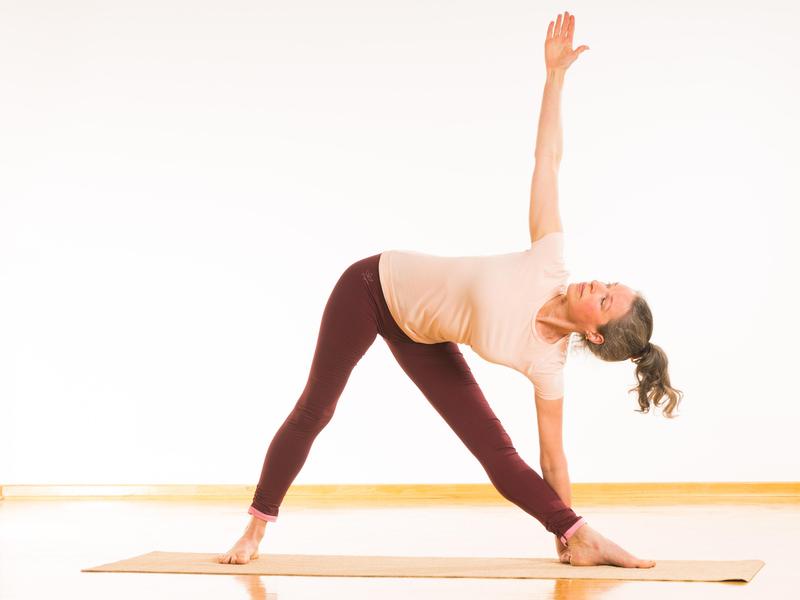
The Triangle
This is a standing pose that gives your spine and backmuscles a lateral stretch, increases the flexibility of your hips and improves your circulation. If you practice regularly, the triangle helps you to maintain a youthful gai
- Begin by standing with your feet wide apart. Make sure that they are wider than your shoulders.
- Turn your right foot out at a 90-degree angle and rotate your left foot inwards to a 45-degree angle.
- Raise your arms to shoulder level, parallel to the ground with your palms facing downwards. Lengthen your rib cage to your right and extend your right arm out over your right leg, without letting your body twist. Move to your right as much as possible.
- Reach down with your right hand to hold your right ankle. If you can’t reach your ankle, hold your shin or thigh. Think of your arms, shoulders and collar bones as comprising a single unit with no joints. As your right arm goes down, your left arm stretches straight upward.
- Stretch your left arm up towards the ceiling keeping your fingers together; look up at your finger tips.
- Breathe deeply; hold the pose for at least 10 seconds, gradually increasing the time to 30 seconds.
- Release it and repeat the triangle on the other side. Do this 2-3 times on each side, remembering to not twist your body.
Triangle variation: rotated triangle
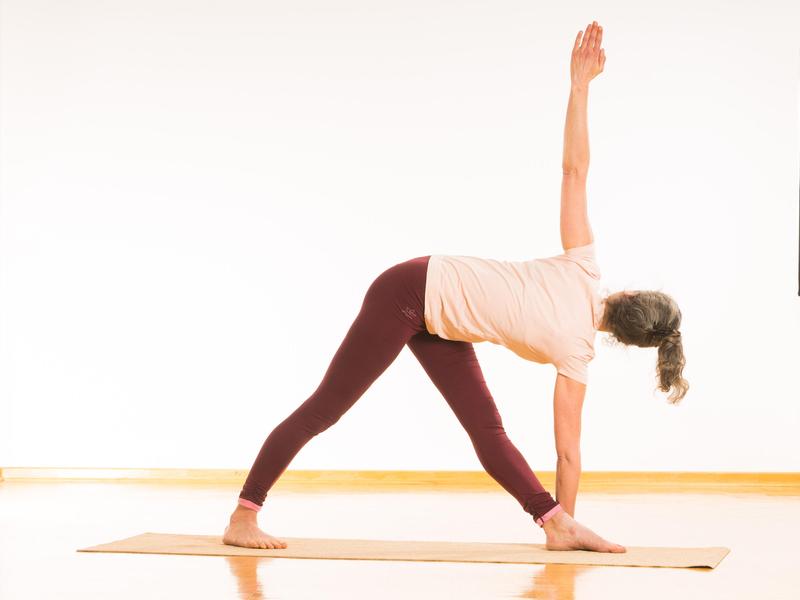
This is a challenging, yet fun variation of the basic triangle pose that does wonders to tone your spinal nerves and abdominal organs. Also, it stimulates the energy in your solar plexus region and helps to balance the ‘manipura’ chakra. You might want to practice the triangle pose for a while before attempting this slightly more advanced variation.
- Begin by standing with your feet wide apart. Have your feet parallel to each other, with your toes facing straight ahead.
- Extend your arms straight out to the sides at shoulder height, with your elbows straight.
- Twist from your waist, rotating your upper body to face the left. Try to place your right hand on the floor outside of your left foot. It is best if you can have your hand flat on the floor – or place your hand on a block, if you are unable to reach the ground.
- Stretch your left arm straight up and look up at the fingers of your left hand, which should be pointing up towards the ceiling. Think of your arms, shoulders and collar-bones as comprising a single unit with no joints.
- Hold the pose for at least 10 seconds, gradually increasing the time to 1 minute. Then release it and repeat on the other side.
NOTE: do not attempt this pose if you have high blood pressure
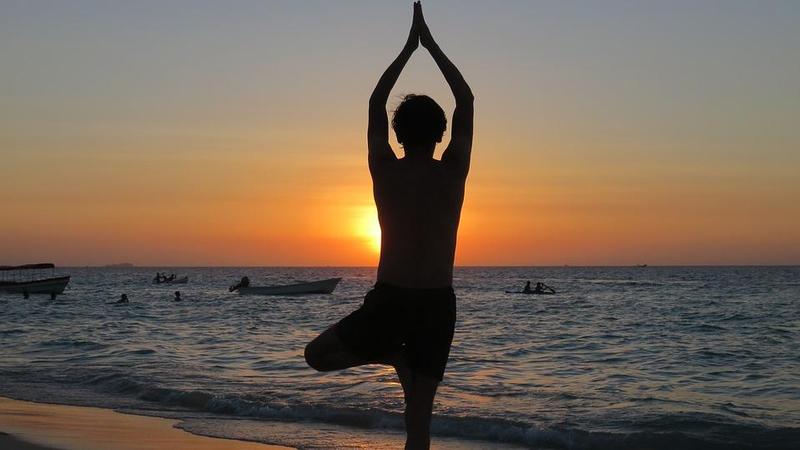
The Tree - Vrikshasana
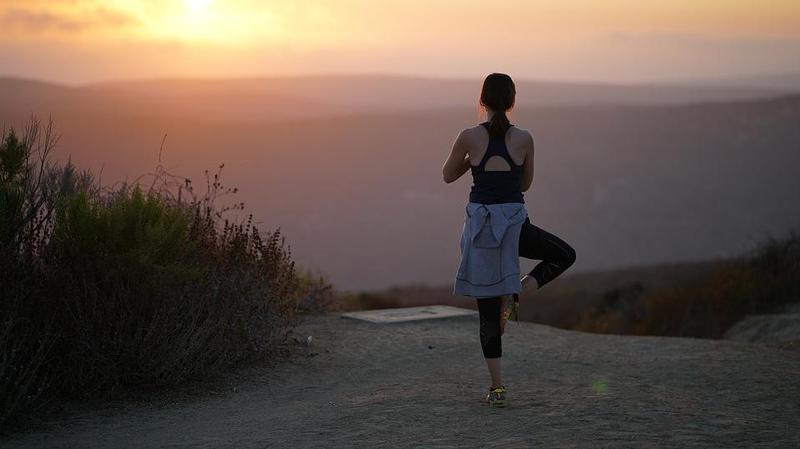
The Tree pose enhances your physical and mental balance and helps you to develop a firm foundation for your spiritual practice.
- Begin by standing in tadasana (see above).
- Look at a point on the wall or on the ground approximately 3 feet (1 meter) in front of your feet. This will help you to maintain your balance.
- Bend your right knee and place the sole of your right foot flat against the inside of your left thigh.
- Keep your left knee straight and your left foot steady and grounded.
- If you are having difficulty balancing, stand with your left side about 6 inches away from a wall. Place your left hand on the wall until you feel ready to balance; then remove your hand from the wall.
- Bring your palms together in front of your chest in a ‘Namaste’.
- Keeping your palms together, slowly straighten your elbows and extend your arms straight up over your head.
- As you hold the position, balancing on your left leg, feel as though you are sending down roots into the ground. Be aware of the gravity of the earth, do not resist it, but feel as though it is assisting you in standing firmly.
- Hold the tree pose for 10 seconds, gradually building up to 1 minute.
- Lower your right foot and your arms. Return to tadasana and repeat the pose on the other side.
The Peacock
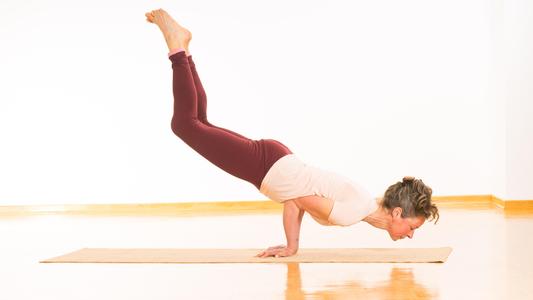
One of the more enigmatic of the asanas, the Peacock pose tones your digestive system as it brings flexibility to your hands, wrists and fingers – and strengthens your arms and shoulders.
On an energetic level, the Peacock stimulates and helps you to balance your manipura (solar plexus) chakra. When you have mastered this pose, your body resembles a beautiful proud peacock with its tail feathers spread.
- Sit on your heels with your big toes together and your knees wide apart.
- Bring your elbows, forearms and wrists together in front of your chest with your palms facing upwards.
- Place the palms of your hands flat on the ground between your knees, with your fingers pointing it towards your body.
- Bend your elbows into your abdomen, without letting your arms move apart. If you experience difficulty in keeping your elbows together, you might want to experiment with using a yoga strap
- Lean forwards and rest your forehead on the ground.
- Stretch one leg straight back and then the other. You are now balancing on your toes, hands and forehead.
- Lift your head so that you are standing on your hands and toes.
- Slowly shift your weight forward until you feel come off the ground. DO NOT JUMP! Come into the peacock slowly
- Hold the pose for 2-3 seconds, gradually building up to 15 seconds – or longer, if you like.
Caution: Don’t attempt the Peacock if you are pregnant, menstruating or experiencing abdominal cramps.
The Crow
- Come into a squatting position, with your feet and knees wide apart.
- Imagine your hands as crow’s feet. Spread your fingers wide. Place your palms flat on the ground between your legs. Have your hands rotated inward slightly and your elbows bent outward. If you are more advanced and/or stronger you may choose to attempt the crow with your arms straight.
- Rest your knees on your upper arms and slowly rock forward, keeping your head up.
- When you feel your weight on your wrists, slowly raise one foot off the ground and then the other. Hold the position. If you cannot lift your feet, just hold the position with your weight on your wrists.
- Try to hold the crow for at least 5 seconds, gradually increasing the time to 30 seconds. Repeat it 2-3 times. Remember to keep your chin up; don’t let your head drop forward.
Note: You might want to place a cushion on the ground in front of you, in case you lose your balance.
Poses for meditation
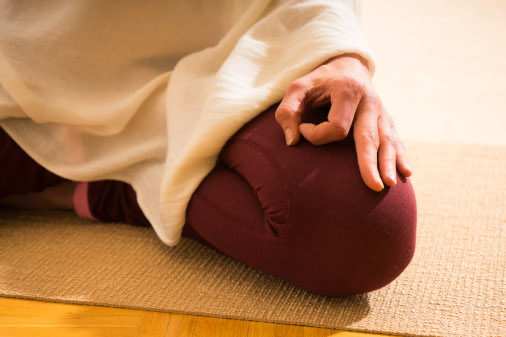
The ideal posture for meditation is stable, straight and comfortable. Your spine, maintaining its natural curvatures, should be perpendicular to the ground to take advantage of the natural energies of the earth. It is also important to give your lungs the space to expand fully. An upright spine helps you to concentrate and promotes the flow of energy throughout your body.
Simple cross-legged position – sukhāsana
This simple cross-legged position is an excellent way to stop energy from ‘leaking’ during meditation and facilitates your inner focus. Sitting with your legs loosely crossed, with your feet under the opposite knee or thigh, physically contains your energy. Your legs form a sort of infinity symbol.
It is important that your knees are lower than your hips. If you are a beginner or your hips are stiff, sit on a cushion, yoga block or folded blanket. This will lift your buttocks and relieve any tension you might be experiencing in your lower back and hips. However, don’t sit too high, otherwise your back will arch. Try to place your knees on the ground or else support them with cushions or rolled-up blankets.
Adept’s pose – siddhāsana
Sit on the ground with your legs stretched forward. Bend your left knee and place your left heel just in front of your pubic bone, as close as possible. Then fold your right knee, lift the right foot and tuck it behind the left calf.
Half-lotus – ardha-padmāsana
This pose is simpler than the lotus pose, but gives many of the same benefits of stability and grounding your body. Begin by sitting in a simple cross-legged position. Bring one foot on top of the opposite thigh, with the sole of your foot facing upward. The other foot can remain folded under the top leg, beneath the knee or thigh.
Lotus pose – padmāsana
Bend your right knee and gently place your right foot on top of your left thigh, as close to the trunk of your body as possible. Then bend your left knee and place your left foot onto your right thigh. The soles of both feet should be facing upwards.
It important to have both of your knees are on the ground in the lotus pose. Remember that this is an advanced yoga pose, requiring a great amount of hip flexibility. Do not try to force your legs into this position. It is not suggest that you attempt the lotus pose if you have knee problems, varicose veins or problems with your legs falling asleep during meditation.
Sitting on a chair
If sitting on the ground is not a feasible option, use a straight-backed chair. It is not a good idea to sit on a bed or other soft furniture.
Have your knees and feet hip-width apart. The lower legs, from the knees downward, should form two parallel columns that are perpendicular to the ground. Place your feet flat on the floor with the toes pointing forward; this helps you to ground yourself. Never cross your legs or your ankles. If your feet don’t reach the floor, rest them on blocks, or on a cushion or folded blanket.
Once you have brought your body into one of these sitting positions, you can rest your hands in your lap, on your thighs, or bring them into a mudra.
Yoga Vidya is a non-profit association and Europe's leading provider of education and training in yoga, meditation, Ayurveda, massage, holistic health and spirituality.
